DIY Raspberry Pi Pico Environmental Monitor
Creating an environmental monitor with your Raspberry Pi Pico is a rewarding project that combines sensor integration, data logging, and visualization. This project can measure temperature, humidity, pressure, and air quality — and display or log the data for later analysis.
🧰 Components Needed
- Raspberry Pi Pico — The main microcontroller
- Environmental Sensors (choose based on your needs):
- BME280 or BME688 — Temperature, humidity, and pressure
- MQ135 — Air quality (CO2, NH3, alcohol, benzene, smoke)
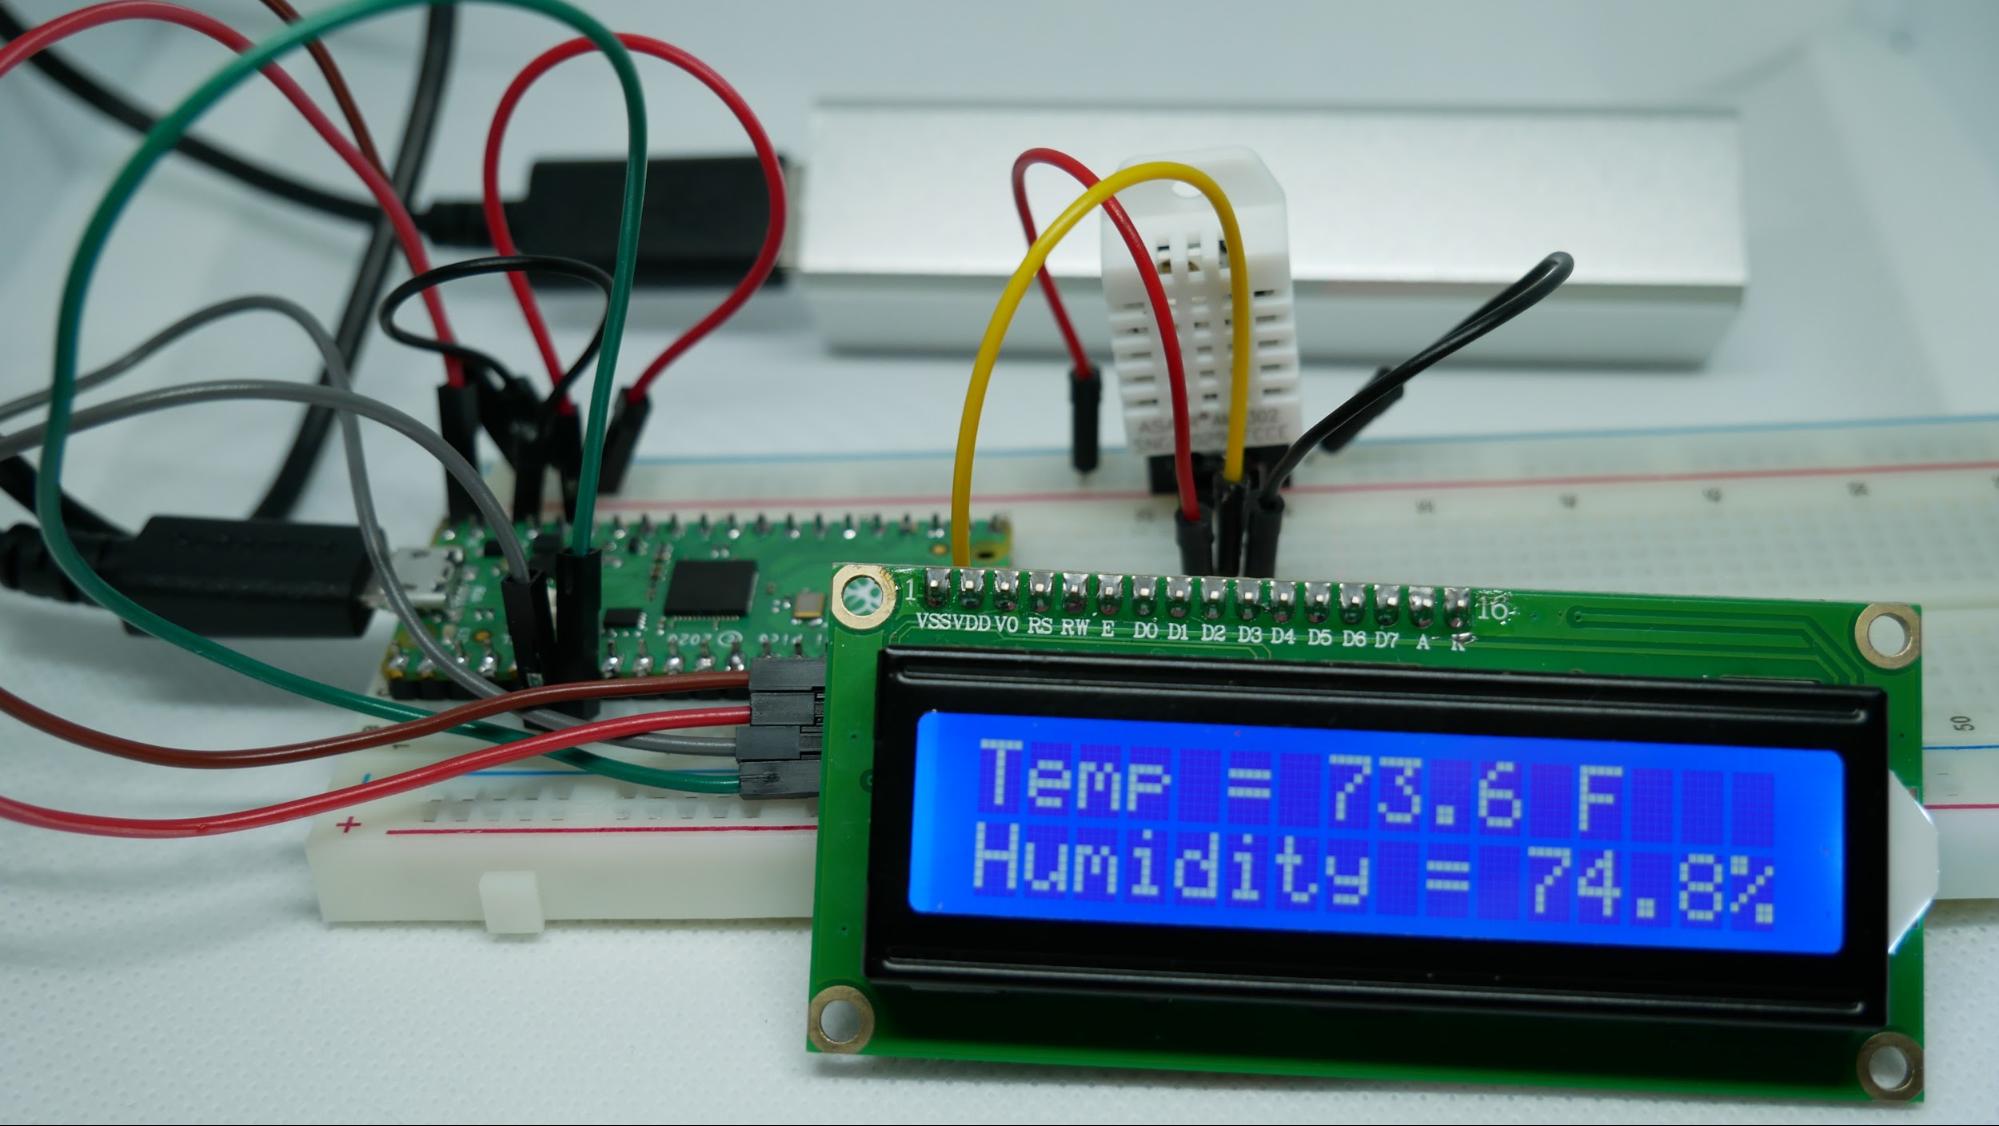
- DHT22 — Temperature and humidity
- Breadboard and Jumper Wires — For connecting components
- Power Supply — USB cable to power the Pico
- MicroSD Card Module (optional) — For logging data
- Display (optional) — OLED or LCD to show real-time readings
🛠 Step-by-Step Build
1. Set Up the Pico
- Install MicroPython on your Pico (official guide).
- Connect the Pico to your computer and open the Thonny IDE.
2. Connect the Sensors
- Wire the sensors to the Pico using a breadboard and jumper wires.
- Example: The BME280 sensor uses I2C communication — connect it to Pico’s I2C pins.
3. Install Required Libraries
- In Thonny, install MicroPython libraries for your chosen sensors.
- For the BME280, use the
bme280MicroPython library.
4. Write the Code
Example MicroPython code for the BME280:
import machine
import bme280
import time

i2c = machine.I2C(0, scl=machine.Pin(17), sda=machine.Pin(16))
sensor = bme280.BME280(i2c=i2c)

while True:
    temperature, pressure, humidity = sensor.read_compensated_data()
    print("Temperature:", temperature / 100, "C")
    print("Pressure:", pressure / 25600, "hPa")
    print("Humidity:", humidity / 1024, "%")
    time.sleep(2)
5. Log or Display Data
- Logging — Write readings to a file on a microSD card.
- Display — Show real-time data on an OLED or LCD.
6. Power the Setup
- Use a USB power bank or wall adapter for portable use.
💡 Additional Tips
- Calibration — Calibrate sensors for accurate readings.
- Enclosure — Protect electronics with a custom case.
- Cloud Integration — Send data to a cloud service for remote monitoring.
📚 References
- Environmental Monitoring with Raspberry Pi Pico W — Circuit Cellar
- Pi Pico Environmental Sensing Workout — Instructables