DIY Raspberry Pi Pico Weather Station
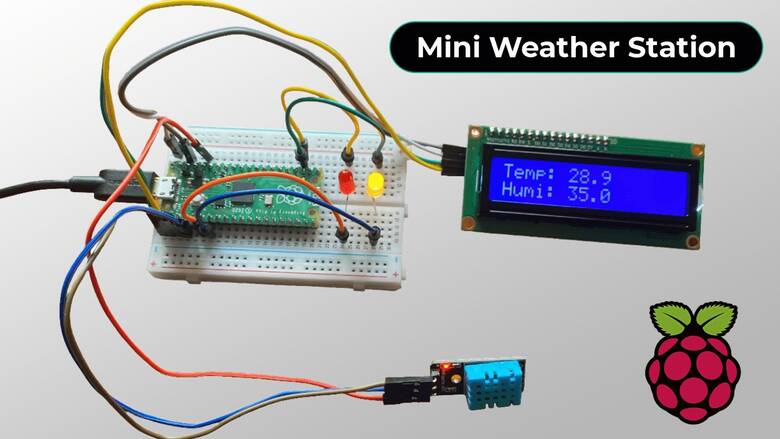
With the Raspberry Pi Pico, you can measure temperature, humidity, and atmospheric pressure, while learning to interface with sensors. This is an excellent beginner-to-intermediate project for exploring sensor integration and data visualization.
Your weather station can:
- Display real-time data on a small screen
- Log readings to your computer
- Send live data to a web browser if using a Pico W or Pico WH
🧰 Components You’ll Need
- Raspberry Pi Pico (or Pico W/WH for wireless capability)
- DHT11 or DHT22 sensor — Measures temperature and humidity
(I recommend the DHT22 for better accuracy) - BMP280 or BME280 sensor (optional) — Adds atmospheric pressure readings
(BME280 also provides altitude and advanced metrics) - OLED or LCD display — Shows collected data in real time
- Breadboard and jumper wires — For easy wiring and experimentation
- MicroPython installed on your Pico
🛠 Step-by-Step Instructions
1. Install MicroPython
Follow the official guide to install MicroPython on your Raspberry Pi Pico.
2. Wire the Sensors
Using jumper wires and a breadboard:
- VCC → 3.3V on Pico
- GND → Ground on Pico
- DATA → Chosen GPIO pin (e.g., GP15)
If using the BMP280/BME280, connect via I2C (SCL/SDA pins).
3. Basic MicroPython Script
Example script to read from a DHT22 sensor:
import dht
import machine
import time

sensor = dht.DHT22(machine.Pin(15))

while True:
    sensor.measure()
    temp = sensor.temperature()
    hum = sensor.humidity()
    print(f"Temp: {temp}°C  Humidity: {hum}%")
    time.sleep(2)
Run this and view the output via Thonny’s serial monitor.
4. Add a Display
If you’re using an OLED display (SSD1306), install the driver and display readings:
from machine import Pin, I2C
import ssd1306

i2c = I2C(0, scl=Pin(17), sda=Pin(16))
oled = ssd1306.SSD1306_I2C(128, 64, i2c)

oled.text(f"Temp: {temp}C", 0, 0)
oled.text(f"Hum: {hum}%", 0, 10)
oled.show()
5. Wireless Output (Optional)
If you have a Pico W/WH, you can host a small web server to display data in any browser.
📹 Video Tutorial
Watch a step-by-step build here: YouTube Tutorial
💡 Tips & Ideas
- Log data to a CSV file on your computer for later analysis
- Add more sensors for light, rain, or wind speed
- 3D print a weatherproof enclosure for outdoor use
✅ Conclusion
This weather station is an easy way to get started with MicroPython and sensor projects. Whether you display readings on an OLED or stream them to the web, you’ll learn valuable skills in electronics, coding, and data visualization.